N/A tuning is all about perfect balance, compression and revs. Balance and revs go hand in hand, as you need balance of the rotating assembly (crank, rods, flywheel, etc) to handle high revs which are needed for making power. Compression is an equal part of the equation, as its the part makes it go bang!
So hit the jump for part two of our AE86 Tuning Guide!
First things first, for a hard tuned N/A decent exhaust system will be needed. That means at least a decent set of headers, preferably a name brand or custom set of headers, and a preferably mandrel bent high flow system. Sizing of the exhaust system is going to very important, as with a N/A engine a certain amount of back pressure is going to be needed. Too much back pressure and you’ll strangle your engine, too little back pressure and you’ll have nothing until up high, and lose torque down low.

Also the type of header/extractors you run will make a difference. A long tuned-length 4-into-1 type header will provide a mid to high range power band, where as a more conventional equal length 4-into-2-into-1 type of header will provide a more low to mid range power band. 4-1 as good for on the track where your regularly in the upper end of the rev range, where as the 4-2-1 is more suited to the street, where you spend most of your time in the lower to mid range of the rev range. This theory is not the be all and end all of the 4-1 and 4-2-1 discussion as either have been proven numerous time in either environment, it comes down to what you can live with for your car.
As an example I have TRD copy headers, a 2.25″ (60mm) mandrel-bent system with high flow cat converter, and generic high flow muffler. The headers are equal length and quite good for what they are, but i feel a better set of tuned length 4-1 headers will suit my high comp engine better. again this my personal preference, and your opinion may differ from mine.

TOUGH AS NAILS
For any hard tuned 16v or 20v engine a strong and balanced bottom end is a must and not all 4A-GE bottom ends are created equal! The big port bottom end was the original but is far from the best. Small port, silver top 20 valve, and black top 20v all use a 7 rib bottom imbuing it with a stronger, more rigid block. IN addition to the added strength, they also employ oil squirters in the block to assist the underside of the pistons in keeping things lubricated.
In contrast the big port bottom end did not have the same block strength or the oil squirters, but a later kouki update fixed this as all blocks were the 7 ribbed bottom end. The big port crank is a good bit of gear, being quite strong, but with the update to smallport and 20v, Toyota being Toyota made the cranks stronger.

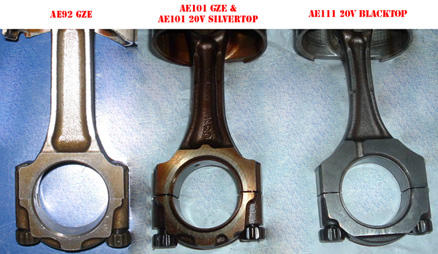
This is the same case with the conrods as well. The smallport conrods and silver top 20v conrods are nigh indestructible in a N/A application, as they are much larger physically and thicker than the big port and blacktop 20v rods. The black top 20v rods are also stronger than big port rods, although they are smaller and lighter, metallurgy technology had progressed enough to run lighter but stronger rods compared to the silvertop 20v.
So now you know the differences. When building a hard tuned N/A 4AGE it best to use a smallport or silver top bottom end, due to their inherent strength especially at high RPM. The crank and flywheel will need to balanced to a high tolerance and RPM for best results in a N/A application. The rods will need to balanced as well so when your screaming down the track at 9000rpm nothing is moving about un-necessary causing major damage!
Now attached to your fully balanced bottom end are the next step, pistons (yes that is mine, on my desk at work).
With a hard tuned N/A engine this is quite possibly the single most expensive part of you new engine. Pistons are the major part that provides the compression in the engine, and without the compression a lot power and response is going to waste.
For a hard tuned N/A engine a minimum of 11:1 compression is needed. This can be achieved with a standard smallport bottom end, but if your taking it apart to balance everything and headwork, why not go that extra mile and get a decent sit of high comp aftermarket pistons.
If you trying to do things on the cheap, a 20v bottom end will attach to a 16v head with a minimum of fuss, as 4AG’s are a non-interference engine. In doing so you get a healthy jump in compression, anywhere from 11.5:1 to over 12:1 in some cases. The only issue with this is the 2nd hand nature of the 20v bottom, it may be in worse condition than the 16v one you swapping it for.

PISTON? or PISSED OFF?
So back to pistons, if your balancing the engine a quality set of aftermarket pistons is worth it. Companies such as Wiseco, TODA, Tomei and Mahle (in fact I have a list of about 20 piston manufacturers for 4A-GE pistons too long to list here….) to name a few, but all provide high comp forged pistons in varying sizes. The standard 4A-GE piston is 81mm, but you can purchase 81.50mm and 82mm oversized pistons.
With 82mm pistons, a bore of the block is required. You get a small capacity increase up to 1630cc as a maximum, over the standard 1587cc. There are also pistons of varying dome height, with factory smallport being 5-6mm. the wiseco pistons run up to a dome height of 30mm (1.2″) which gives a static compression ratio of up 12:1. they are also lightweight and strong, and will last a long time at high RPM.
So now you’ve got you bottom end sorted, which head do you use?

TOTAL HEADCASE
This is up to the individual, but it has been proven a 20v head flows better than a 16v head. But having said that a smallport head can make almost as much power as a 20v head. By far the blacktop head is the best for N/A 20v, and the smallport is best for N/A 16v. Head work is vital in this area and make sure you or your engine builder knows what he’s doing or has at least a history in dealing with japanese or OHC engines.
Opening of the intakes in the head is usually the first part, as well as smoothing out all the casting area and removing any casting dags. then onto a angled valve cut and lapping the valves (cutting back the lip on the back of the valves, so air and fuel flows in before the valve is fully open).
Smoothing of the combustion chamber and surrounding area does not gain power, but aids in smooth flow in of the air and fuel. Opening of the exhaust ports is not always necessary, but it doesn’t hurt either. A good polish of everything to allow air to travel faster without getting “caught” on parts of the engine make for a more responsive and efficient engine.
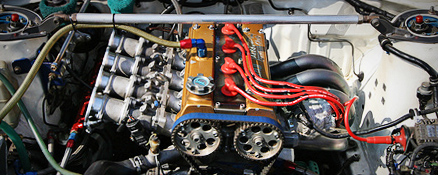
Its about this time you should be adding a set of quads or individual throttle bodies (ITB’s) to you 16v. a set of 20v quads are the best and easiest to use, as there are a number of people and companies making quads adapters for 16v’s. Quads also work best on 16v’s when combined with a set of cams…

LUMP STICKS
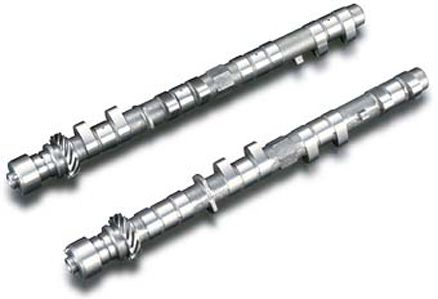
Probably the hardest part of any engine build is deciding what camshafts to use.
The cams for 16v and 20v are quite different so ill start with 16v cams first. For a street driven car with a 16v a maximum of 272°-288° deg cams with about 8.5mm lift, is really about the most streetable your going to get. Any bigger than that and it will be a pig to drive in traffic, that’s not to say you can’t use bigger cams but the bigger cams only really operate well at high RPM.
290°-312° deg cams are best used on the track where the constant high RPM will always have them ‘on lobe’. Usually these cams have a lift about 9.5-11mm on 16v engine and are extremely lumpy, and idle is usually pretty high with cams such as these (around 1500rpm).
Remember if you’re going to be running high-lift cams in a 16v, a shim under bucket conversion is required for the engine to operate correctly. Tonnes of info on google about this specific modification if you’re venturing down this race-engine-only path.
20v cams in contrast come with a higher amount of lift from the factory compared, and also a larger duration. factory big port cams are 240° deg and 7.5mm lift compared to smallport which are 230° deg and 7mm lift.
20v cams start at 8mm lift and 250° deg duration, so baby cams for a 20v are in the 260° deg range. Again the maximum ‘streetable’ cams for a 20v are in the 288° deg range, but they have a huge amount of lift at 10mm.
Again anything in the 295° – 312° deg range is best left for the track as again the amount of high revs needed would make it a pig to drive in traffic.
Companies such as TODA, HKS, Tomei, Wade, Tighe and Kent make cams for a 4AGE. Wade, Kent and Tighe, can grind custom cams for you to your specs. They won’t be cheap though and are usually best for race applications.

KRANG WOULD BE JEALOUS
And now the brains of the operation a programmable ECU. This again is a individual preference, and you definitely get what you pay for!
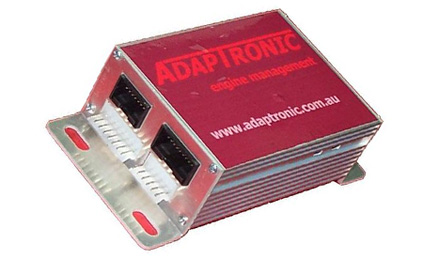
Motec is usually out of reach of most people, but is the best but probably a bit of overkill for you daily streeter ’86. Something like an Autronic, Haltech, Microtech, or EMS have been tried and true, and proven time and time again. There are a also number of high-quality cheaper options available such as Adaptronic, which have also been well tested and proven but still being comparatively new to the scene are yet to take the market by storm like the well established brands have.
With a 16v engine you want something that will be able to run the quads as well a knock sensing, and has a large number of load points to allow for extreme fine tuning to make the most of the engine.
With a 20v engine you would want something similar but able to run the engine in more factory way, as the quads are a factory fitment, also so your not chewing through fuel and needing some sort of high octane race fuel to drive the car. When doing a 20v conversion using a programmable ECU makes the conversion process easier, instead of trying to wire in the standard ECU into a 20 year old rats nest of wiring!
An ECU is only as good as it tuner though, so make sure you talk the people who are tuning your engine and dealt with N/A cars before, and your ECU of preference.
STROKE IT! STROKE IT! STROKE STROKE…
Enlarging the capacity of an engine has been around as long as engines have, and that exact process for the 4AGE is not a new formula.
Way back in the late 1980’s HKS introduced the 5A-GE kit. This kit comprised of a stroker crank and rods, that fitted the standard 4A-G block. The one of biggest problems with the 5AG kit is balance, balance, balance. Your obviously going to want to rev your engine to infinity and beyond, and the crank will need balance. The second part if the problem is block. The block journals need grinding out to accept the larger crank, and crank bearings. This in itself is not a big problem, but again make sure your engine builder is aware that the crank is bigger and work that needs to be done.
Again we turn to the 7A-FE.
Using a 7A-FE block again to make a big cube high revving engine is not a cheap or simple option. first up a custom set of pistons may be needed, companies such as Wiseco and Mahle can make custom pistons for you, but will not be cheap. The second part is a set of forged conrods, in place of the spindly, tooth pick 7A-FE rods. recently there has been a lot of need for forged 7A-FE rods for high comp and turbo motors and a few are now starting to provide them for the discerning buyer, although there still isnt a huge market for them.
The 7A-FE block is quite strong, but because its a grandma-spec engine the water galleries and oil galleries only the bare minimum of what is needed. This is again where your engine builder will need to be on the ball as the both the water and oil galleries will need to be opened up to allow greater flow.
Once the 7A-FE block has been assembled with the high comp pistons and forged rods, your head will need to go on. This can also be problematic as the 7A-GE now becomes an interference engine! Timing will need to be spot on to avoid bent valves and damage to the head.
The 7A-GE can also be bored out using an 83mm piston. The standard 7A-FE capacity is 1789cc, but using the 83mm pistons increases it to 1880cc or 1.9ltrs. Mark Yager (of Yager Performance) has been making these for a number of years for clubmans and will fit what ever head you want.
There are a lot of inherent problems in doing the 7AG conversion, but the benefits FAR out weigh the negatives. If Chris O’Shannessey can come outright 2nd for the year in IPRA then it cant be a bad thing!
RS YASU also make a wicked big cube 4.5AG. Using the 83mm piston (usually a CA18 or Mazda BP1800 piston) the block is bored to accept the larger piston and given a higher comp as well (around 11.5:1). This can really only be done with the 16v engine, due to most 83mm pistons being for 16v engines. If you were going to do this with a 20v engine custom pistons would need to be used to allow for the extra valve cut.
The difference with the 5A-G kit and RS YASU 4.5AG, is that the 5A-G kit will work with ANY 4A-G with a minimum of fuss compared to the RS YASU 4.5AG which is best used with 16v’s.
Hopefully by now you have an idea of what goes into a good N/A engine and can make a informed decision if N/A is the road you want to take.
Stay tuned again for part three of our AE86 Tuning Guide!


16 Responses to AE86 Tuning Guide: Bigger Bang N/A